Windows 8 Upload Failed There Is Not Enough Space on the Disk
Summary :

Are you lot receiving there is non plenty free space on the bulldoze to complete some operations on USB flash bulldoze? If yous tin can confirm Windows says not enough deejay space merely at that place is enough, y'all can effort solutions in this post.
Quick Navigation :
- Flash Drive Says Not Plenty Infinite but There Is Enough
- Why There Is Not Enough Free Space on the Drive
- Solution 1: Split Big File into 4G Chunks - No Data Loss
- Solution two: Catechumen FAT32 with NTFS - No Data Loss
- Solution 3: Format FAT32 with NTFS - Absolute Information Loss
- Bottom Line
- User Comments
Flash Drive Says Not Enough Space but There Is Plenty
I'm trying to copy a big MS Outlook PST file from my piece of work computer to a wink drive and am getting an fault message proverb I don't accept plenty free deejay space. The bulldoze is 8 gigs, I've got diverse files on there that accept upwardly ~two+ gigs, and near 5.7 gigs of infinite remaining. The PST file is ~five.0 gigs and has already been compressed down from ~ten gigs. Tin anyone help me out? Seems like I've got plenty of free disk space to do this.
While attempting to create or transfer large files onto an USB wink drive/external difficult drive, an mistake message may appear:" In that location is not enough free space on the hard drive. Delete one or more files to free disk space, and and then try over again."
Meanwhile, Windows suggests y'all to click "Disk Cleanup" to free deejay infinite past deleting old or unnecessary files, which seems exactly the same with "hard drive is full" issue. But the fact is that: in that location is plenty complimentary infinite on the drive to save these files. How could this error message appear?
Kind remind: In most cases, this error message appears as "the file is too large for the destination file organisation". And this post [Solved] - The File Is As well Large for the Destination File Organisation tells more on this report.
Why In that location Is Not Enough Gratuitous Space on the Drive
This may seem disruptive, but if you try copying more other files to this external hard drive, y'all may find something important: yous can copy the smaller files to this external drive just fine. Only when you try to copy a large file equal or larger than 4GB to the external drive, Windows gives you lot such an fault.
Does this 4GB file size limit brand sense?
The reply is positive. "Non enough free infinite on wink drive" error is caused due to the destination hard drive running an FAT32 file system. FAT32 was first established in Windows 95 and is at present recognized past most reckoner operating systems.
The total size of the files that you lot can re-create to a FAT32 bulldoze could exist equally large as 2TB, however, it has a 4GB file creation and transfer limitation, which ways that files cannot exist created or transferred to the hard drive if they are larger than 4GB.
At present we know the crusade for "not enough disk space simply in that location is plenty". Next, we will show you effective solutions to not plenty disk space error - splitting large file OR converting file system and formatting hard drive.
Solution 1: Split Large File into 4G Chunks - No Data Loss
If yous desire to remove "in that location is not plenty costless space on the bulldoze" and transfer a large file to a removable difficult drive, a solution should be breaking the large file into several parts, with each one smaller than 4GB. As to the file splitting tools, we think many software are competent to do this chore, such as WinRAR, which just takes three elementary steps!
For more information about splitting big files, you can visit How to Separate a Large File with WinRAR.
Solution 2: Convert FAT32 with NTFS - No Data Loss
Converting FAT32 to NTFS should be the most ideal way to set "non plenty disk infinite on wink drive", for it keeps your data intact. For many times nosotros accept explained their differences, thus we are not going to repeat. Y'all can read NTFS vs. FAT32 vs. exFAT – Differences and How to Format to for more information.
Note: The older versions of Windows such as Windows 95, Windows 98, or Windows Millennium do not back up the NTFS file system; while the recent versions of Windows like Windows 2000, Windows XP, Windows Vista, Windows 7/viii/10 work well with the NTFS drives.
In that location are two ways to convert FAT32 to NTFS. In our case, we employ a 16GB USB flash drive marked as I: to show users stride-by-footstep tutorials on fixing "non plenty disk space error".
1. Apply Partition Magician
The starting time selection to convert FAT32 to NTFS is to employ MiniTool Sectionalization Wizard Free Edition. The reason why we recommend this freeware is that yous can use it in Windows XP/Vista/7/8/ten, both 32 $.25 and 64 bits, to convert FAT32 to NTFS without entering so much commands and should finish the conversion in only a few clicks.
Gratis Download
Here is how you can operate using MiniTool Partition Wizard:
Tip: Earlier you carrying out file system conversion past using Partition Wizard, nosotros strongly recommend y'all to cheque file system to ensure goose egg is going wrong.
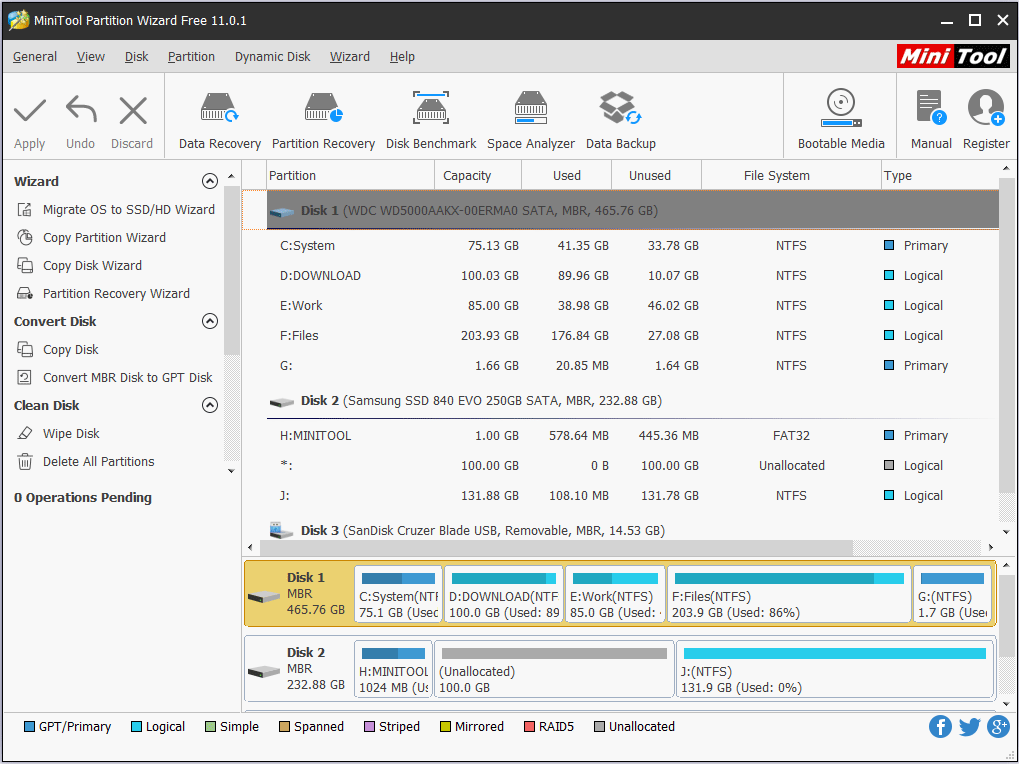
Step 1: Launch MiniTool Segmentation Wizard to its main interface, there you can see all your hard drives connected to your reckoner are listed in the middle pane (y'all may need to elevate the slider to view more).
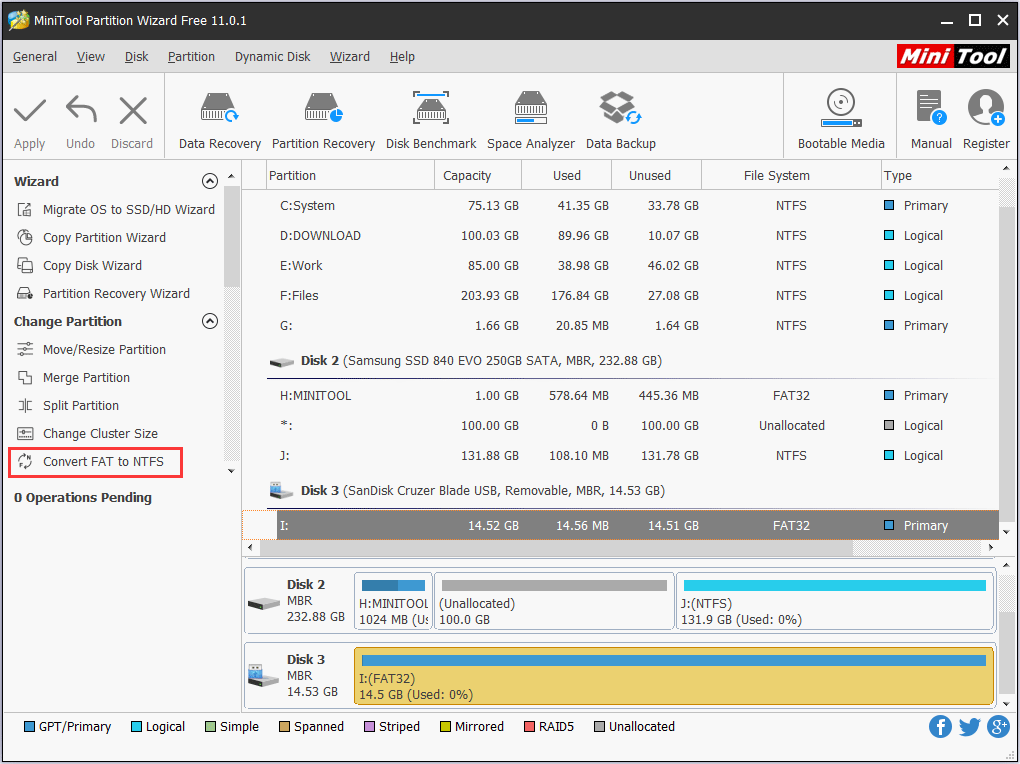
Step 2: Click on the USB hard drive to be converted and select Catechumen Fat to NTFS.
Step iii: A new window will come out on which y'all should click Start to begin the conversion.

Pace 4: When Sectionalisation Sorcerer shows the conversion is completed, y'all but click Shut to finish the small window and then go out MiniTool Division Wizard. Past doing these, not enough costless space on wink drive.
This video tells how to convert FAT 32 to NTFS using Partition Magician:
two. Use Command Prompt
Command prompt is too known as CMD, which is used to behave out entered commands. Usually, people use commands to automate tasks via scripts and batch files, perform advanced administrative functions, or try to solve certain kinds of Windows problems.
Here is how to disable non plenty deejay space fault by using command prompt:
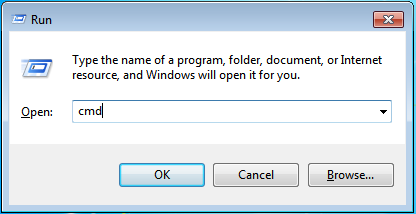
Step one: press WIN+R keys to call out the Run box. In this box enter CMD and printing OK.
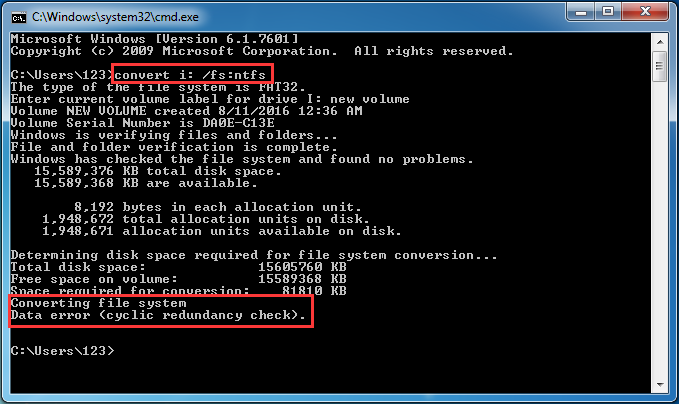
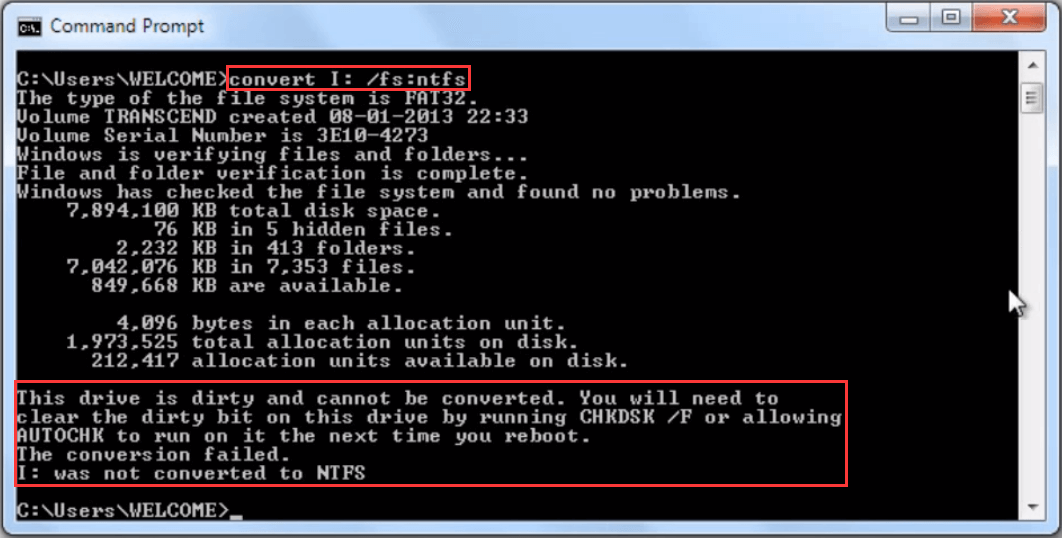
Footstep ii: in the command window, enter catechumen [bulldoze letter of the alphabet] /fs:ntfs and look for the process to terminate. Annotation that you may see "Data error <cyclic redundancy check> ", don't listen considering the selected partition has already been converted into NTFS.
Step 3: enter Leave to drop out the command window.
Attention:
- You should know that this convert command is a ane-mode conversion. Information technology does not provide a way to convert the file organization back to FAT32.
- During the process of file system conversion, yous may encounter Dirty Hard Bulldoze Fault which reports: "This drive is dirty and cannot be converted. Y'all will need to articulate the dirty bit on this bulldoze by running CHKDSK /F or allowing AUTOCHECK to run on it the next time you reboot". To fix this error, you lot just need to enter "CHKDSK /F" every bit suggested and then repeat the convert control.
"Here are two ways to resolve there is not enough infinite on the disk Windows ten/eight/7, and the solution is data lossless." Click to tweet
Solution iii: Format FAT32 with NTFS - Absolute Information Loss
The third solution we put forward is to format the external hard drive to NTFS partition. Windows itself offers the NTFS format option. You lot can format the drive with the NTFS system and use it to disable "there is not enough free space on the drive" so transfer large files.
Attention: Formatting FAT32 to NTFS will definitely cause data loss. Thus, you had better brand a full backup of the USB bulldoze before you carry out this formatting. Even so, if zero is important, merely go ahead.
At that place are four ways to format FAT32 with NTFS. Besides take drive I: for example:
1: Format in Partition Wizard
As nosotros have introduced in the onetime part, Sectionalisation Wizard do help to convert FAT32 to NTFS file arrangement without data loss. As well, information technology is also competent in formatting hard drives equally it offers concise interface and multiple formatting options.
Gratis Download
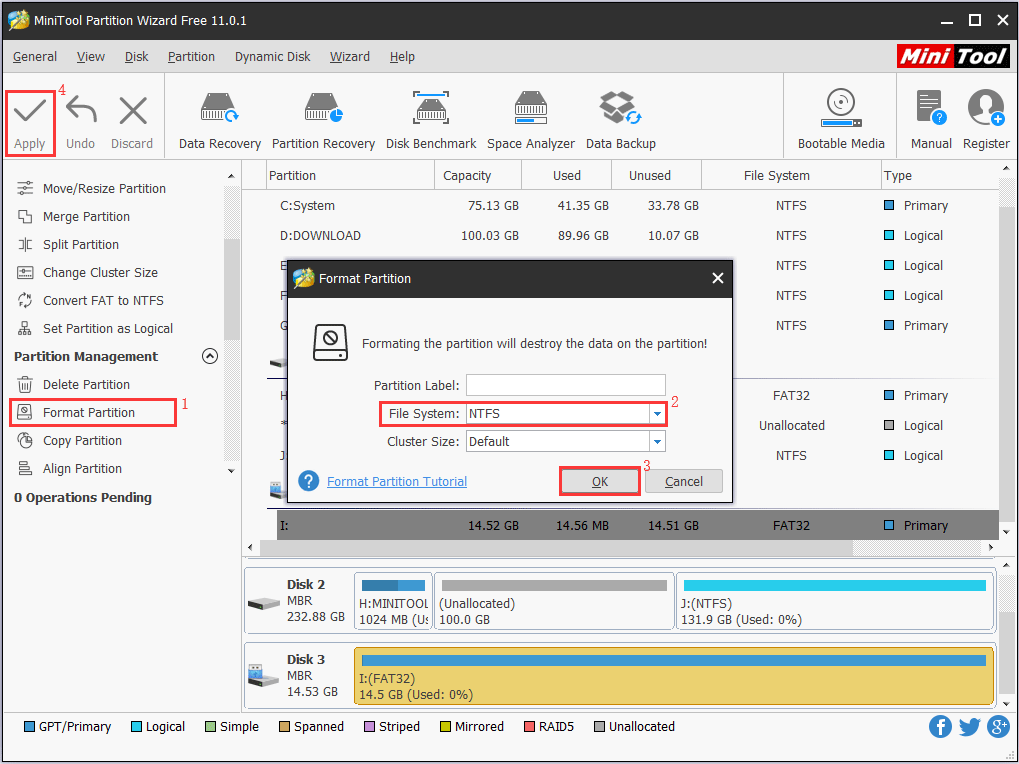
Stride ane: Launch MiniTool Partition Wizard to its main interface, then click on the USB hard drive to be formatted and select Format Sectionalization.
Step 2: Customize the parameters in the new window. Delight choose NTFS as the target File Organization.
Stride 3: Click OK after file organisation selection.
Step 4: Click Apply to cease.
Tip: If y'all regret of formatting a hard drive before you comport out any further operation to the USB drive, yous can use its Data Recovery characteristic (available in Pro Ultimate edition) to help recover data from formatted hard drive.
Gratis Download
2. Format in Command Prompt
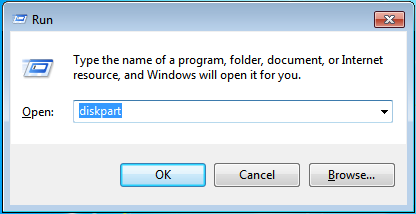
Step ane: Printing WIN+R keys to call out the Run box, then blazon "diskpart" to popular up the Deejay Management window. Note you may need to allow User Account Control.
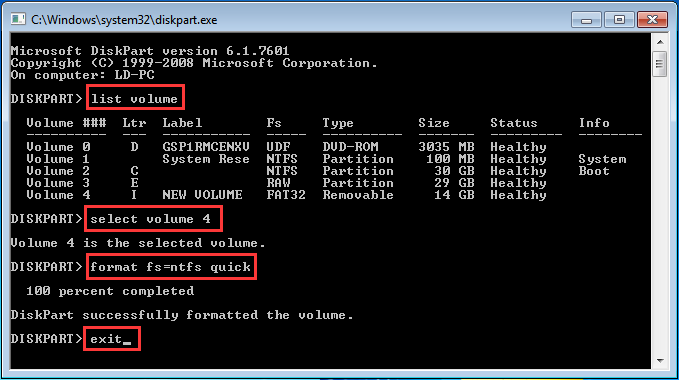
Footstep 2: In the command window, type the following commands in order, and end each ane with Enter key:
- List book
- Select volume n (n is the volume number of your external hard drive)
- Format fs=ntfs quick
- Exit
For a more intuitive guide, please refer to this screenshot:
3: Format in Disk Management
Disk Management is some other utility that can exist used to convert FAT32 to NTFS, and is easier to operate than using Diskpart.
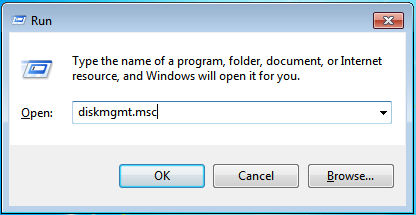
Pace 1: Press Win+R keys to phone call out the Run box, and then blazon diskmgmt.msc to popup the Disk Direction window.
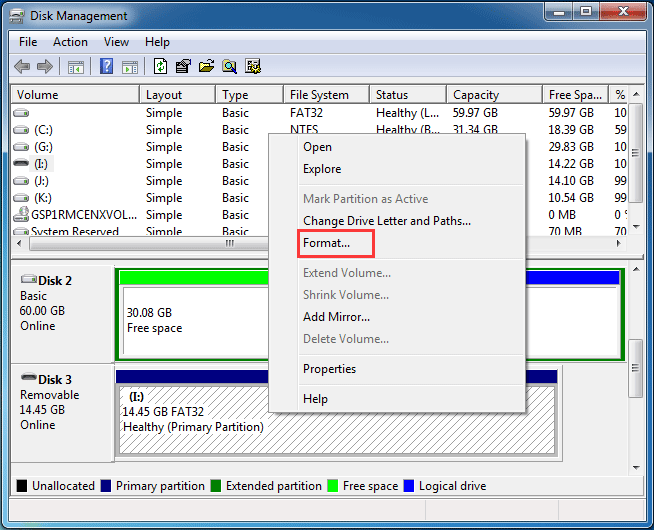
Pace 2: Right click on the difficult drive you want to convert its file arrangement and choose Format.
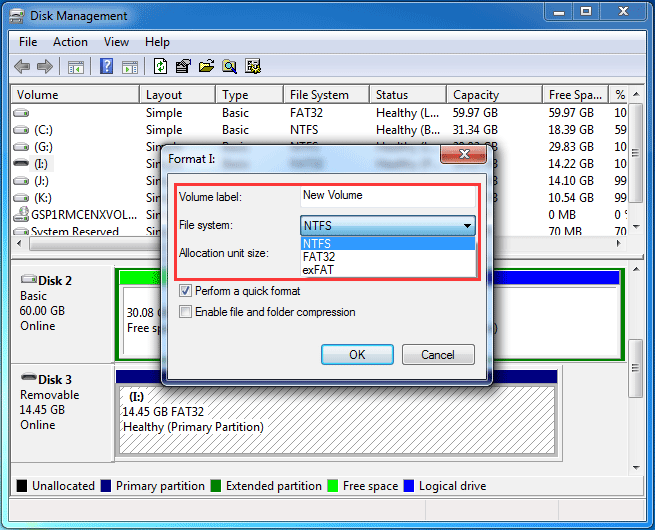
Step three: In the popup window, specify the file system as NTFS, and change the volume label and the cluster size by your needs. Likewise, you may want to cheque the Perform a quick format option, which should speed upwards the formatting process considerably.
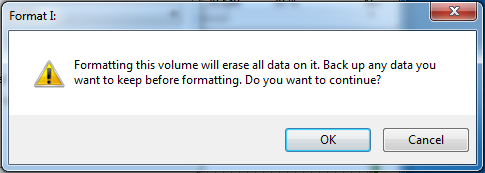
Footstep 4: Windows will warn yous all data on this drive will be erased. Simply click OK if yous accept already fabricated a fill-in in accelerate. The formatting will brainstorm immediately and finally you will get a NTFS external hard drive.
4: Format in My Computer
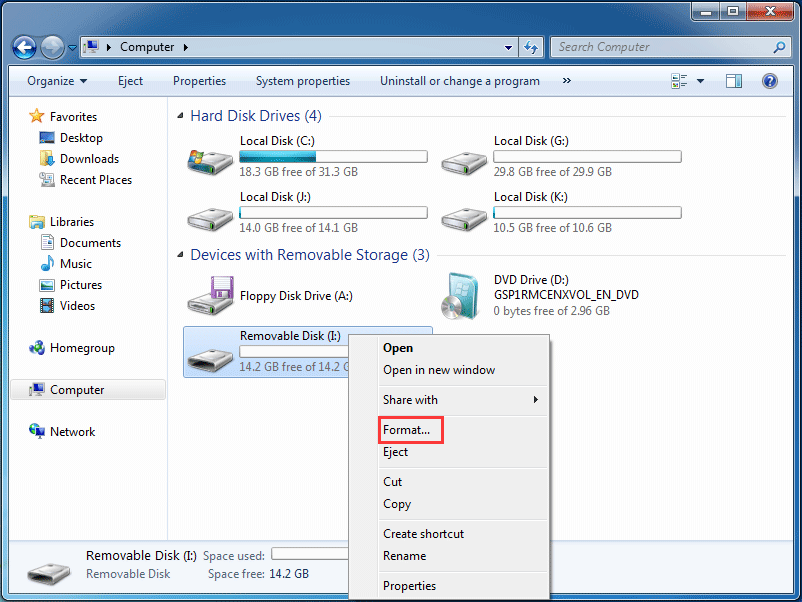
My Computer (equals to This PC in Windows 10) is a location that all drives connected to this computer with drive letter are shown, and users can open them directly to manage files in each sectionalization. To format a partition with NTFS file system, you just practice the post-obit steps:
Pace ane: Double click the Computer icon to load the hard drives. Then right click on the partitioning you desire to convert to NTFS and cull Format.
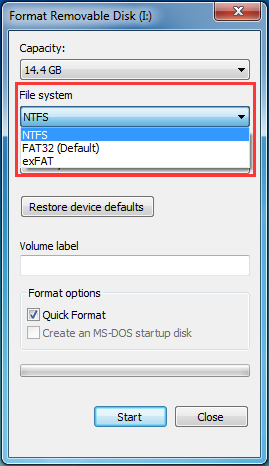
Step two: In the pop-upwardly window, select NTFS as the formatting option. So press First button.
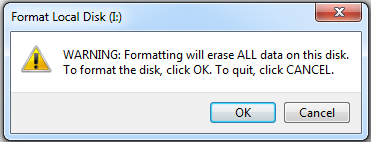
Pace 3: Windows should warn y'all nigh erasing all data on the bulldoze. Once again, if you ostend that you want to go along with the formatting, click OK.
Further Reading: What if NTFS Does Non Showing upward in Format Option?
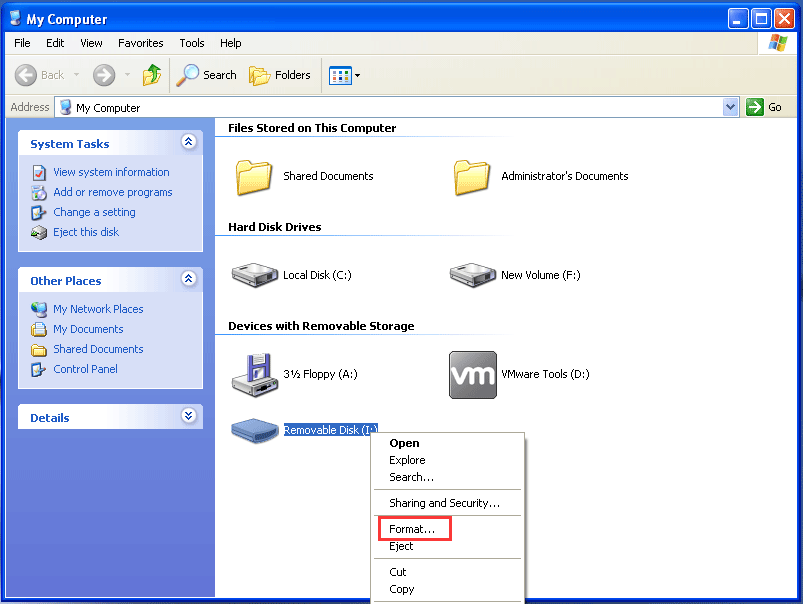
If you lot are using Windows XP, you may find Windows does not offer NTFS as a format selection in the drib-down card.
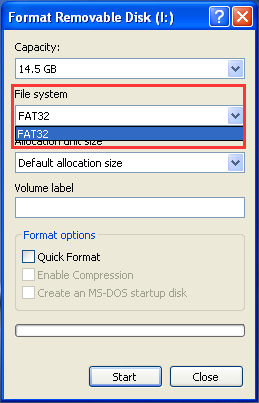
Why there is no NTFS option?
This may happen if your flash drive is treated by Windows XP as a removable drive. More often than not speaking, all external drives are treated as removable disk, unless you set up removable drives as local drives. For the local drives, Windows XP offers the NTFS format option right from the offset; but for removable disks, NTFS is non showing upwards in the format option.
Read and learn: How to Set Removable Drive to Local Drive.
But there is still a way to fix this bug - not going for another OS of class. Please follow the guidance below:
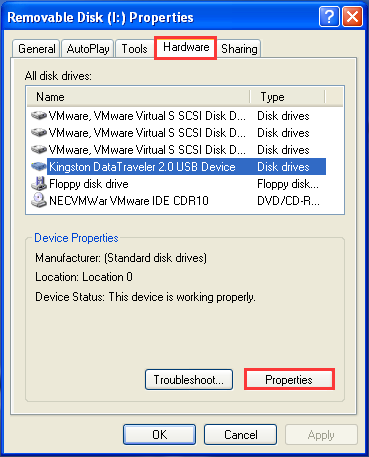
Step 1: Under My Computer, right-click on the removable drive and select Properties from the shortcut menu. Then in the new window select the Hardware tab. There, discover and select the removable drive in the list and press the Properties push.
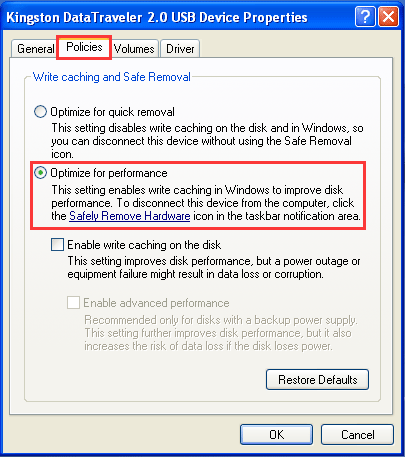
Step 2: On the next screen, select the Policies tab, and there select the Optimize for performance option.
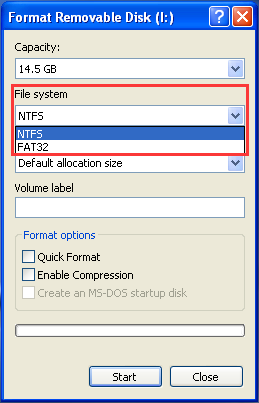
Step 3: Now press OK for several times to close these windows, and effort to format the bulldoze once again. This time, the NTFS pick should appear in the list for you to remove "there is non enough usable space for this operation mistake".
"If Windows tells there isn't enough infinite left on the disk to perform this operation, you tin can effort the unproblematic solutions in this post." Click to tweet
Bottom Line
In this post, nosotros have gone through 3 ways to cope with "not enough disk space mistake": to split big files to smaller chunks, to convert FAT32 to NTFS and to format external difficult drive to NTFS file arrangement, with detailed steps and the explanations to related issues.
Now information technology is your plough to take a try if yous are troubled by "not plenty disk space simply there is enough" effect. For whatever suggestions and questions, you can leave a comment below or contact united states via [e-mail protected]. Thanks in advance!
Source: https://www.partitionwizard.com/partitionmanager/not-enough-free-space-on-the-drive.html
0 Response to "Windows 8 Upload Failed There Is Not Enough Space on the Disk"
Post a Comment